Hardware Information
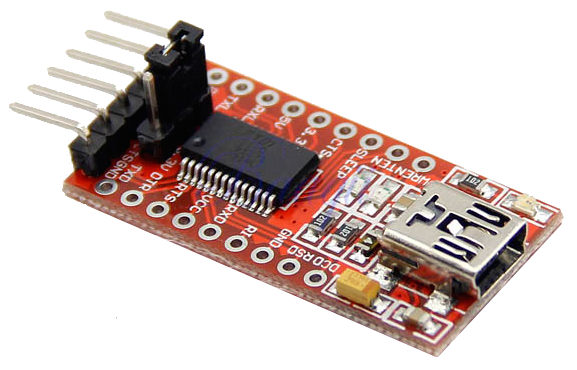 FTD1232 - USB to TTL Serial Adapter - 3.3V and 5V Operation
---
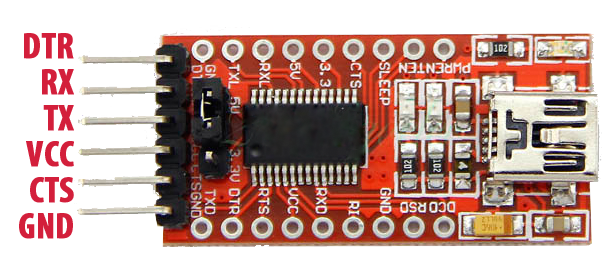
DTR: Data Terminal Ready - an output used for flow control
RX: Serial data Receive pin
TX: Serial data Transmit pin
VCC: Positive voltage output - this is controlled by the jumper. If the jumper is set to 5V, this will provide a 5V output. If the jumper is set to 3.3V, this will provide a 3.3V output.
CTS: Clear To Send - an input used for flow control
GND: Ground or 0V
For most uses, you can simply connect the following pins:
- RX on this board to the TX pin on your device
- TX on this board to the RX pin on your device
- GND on this board to GND on your device
The VCC pin is ideal for powering small devices such as homemade circuits. This pin should not be connected when a device has a separate power supply as this may damage both devices.
Quellen/Source:
- ftdichip.com - Drivers
-
-
-
-
-
-
-
-
-
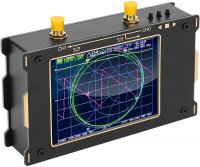
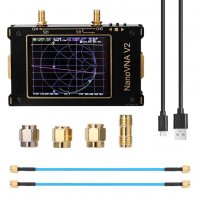
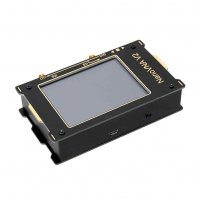
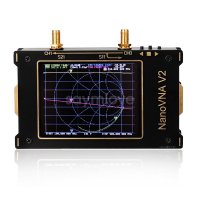
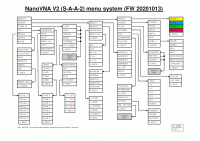
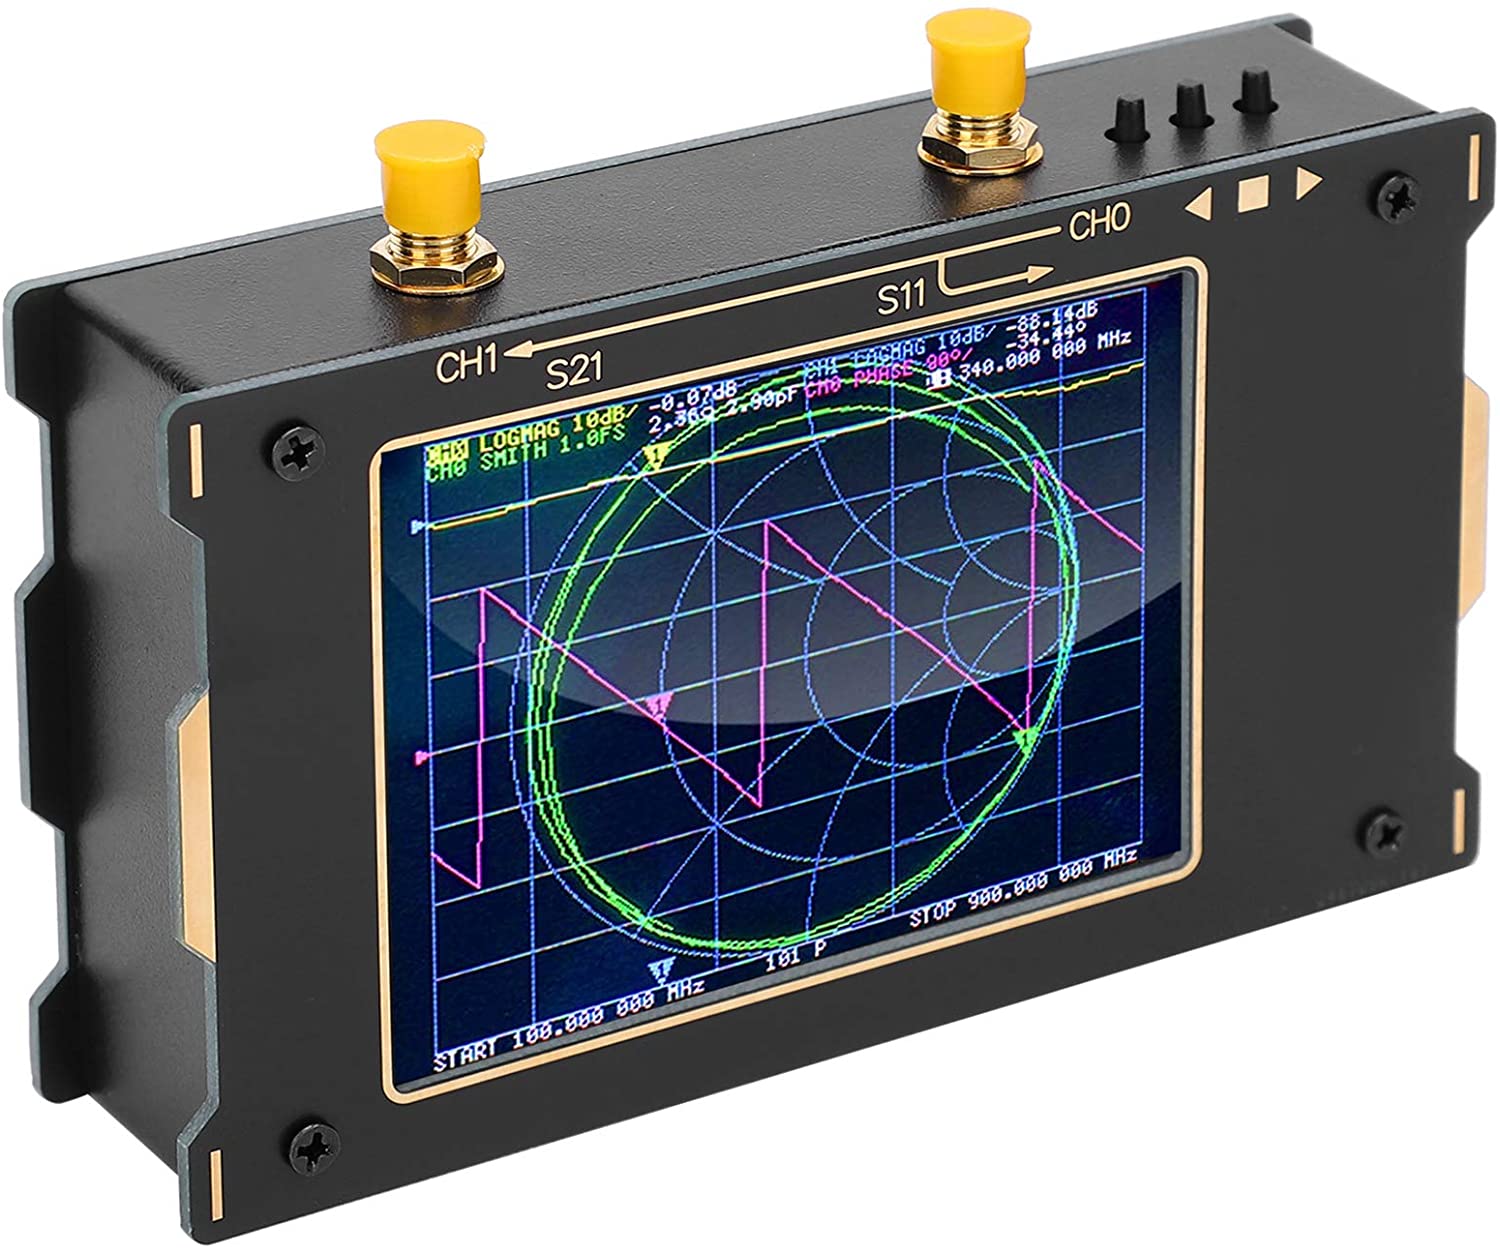 NanoVNA V2
 |
- Silver Load - golden Short (with Pin) - and open (no Pin) |
Videos:
- youtube | Andreas Spiess | #359 How to properly use a NanoVNA V2 Vector Network Analyzer & Smith Chart (Tutorial)
- youtube | IMSAI Guy | #480 NANOVNA Made Simple
- youtube | IMSAI Guy | #350 NanoVNA Vector Network analyzer 900MHz VNA
- R&S®ZVA network analyzer basics part 2: Calibration
- youtube | joe smith | The NanoVNA, a beginners guide to the Vector Network Analyzer
-
-
-
-
-
-
-
- youtube | Andreas Spiess | #191 Optimizing Antennas using a cheap N1201SA VNA (Vector Impedance Analyzer), LoRa, Review
-
Quelle:
-
- NanoRFE - NanoVNA V2
-
-
-
-
-
-
| Gewinde | fein [mm] | mittel [mm] | grob [mm] |
|---|---|---|---|
| M1 | 1,1 | 1,2 | 1,3 |
| M1,2 | 1,3 | 1,4 | 1,5 |
| M1,4 | 1,5 | 1,6 | 1,8 |
| M1,6 | 1,7 | 1,8 | 2 |
| M1,8 | 2 | 2,1 | 2,2 |
| M2 | 2,2 | 2,4 | 2,6 |
| M2,5 | 2,7 | 2,9 | 3,1 |
| M3 | 3,2 | 3,4 | 3,6 |
| M3,5 | 3,7 | 3,9 | 4,2 |
| M4 | 4,3 | 4,5 | 4,8 |
| M5 | 5,3 | 5,5 | 5,8 |
| M6 | 6,4 | 6,6 | 7 |
| M8 | 8,4 | 9 | 10 |
| M10 | 10,5 | 11 | 12 |
| M12 | 13 | 13,5 | 14,5 |
Kernloch (Als Kernloch wird eine Bohrung bezeichnet, in die ein Innengewinde geschnitten wird)
| Gewinde | Steigung | Kernloch ⌀ |
|---|---|---|
| M12 | x1,75 | 10,2 |
| M10 | x1,5 | 8,5 |
| M8 | x1,25 | 6,8 |
| M6 | x1 | 5,0 |
| M5 | x0,8 | 4,2 |
| M4 | x0,7 | 3,3 |
| M3 | x0,5 | 2,5 |
| M2 | 1.5mm |
Infos zu Durchgangsbohrung aus dem wikipedia
Eine Durchgangsbohrung oder ein Durchgangsloch ist eine Bohrung durch ein Bauteil hindurch mit dem Zweck, eine Schraube, einen Niet oder einen Bolzen durchführen zu können. Sie unterscheidet sich vom Sackloch, das nicht bis zur Rückseite des Bauteils reicht.
In den Normen (z. B. DIN 75) werden den Schraubendurchmessern entsprechende Lochdurchmesser angegeben. Außer der bevorzugten „mittleren“ Reihe gibt es auch die Reihen „fein“ und „grob“ mit jeweils einem etwas kleineren bzw. größeren Durchmesser. Bei Wahl der Reihe „grob“ wird die Montage erleichtert, oder/und Fertigungsfehler wirken sich weniger hinderlich aus (übereinanderliegende Löcher sind nicht koaxial).
Ein durchgehendes oder Sack-Loch, in welches ein Innen-Gewinde für eine Schraube hineingeschnitten werden soll, wird als Kernloch bezeichnet.
Infos Kernloch aus wikipedia
Als Kernloch wird eine Bohrung bezeichnet, in die ein Innengewinde geschnitten wird.
*Funktion*
Der Durchmesser des Kernloches (Bohrung) ist minimal kleiner als der spätere Innendurchmesser des Gewindes. Durch den Schneidvorgang mittels eines Gewindebohrers wird das Material beim Gewindeschneiden herausgeschält und der entstehende Grat zu Gewindespitzen ausgeformt. Beim Gewindeformen wird das Material zur Gewindeflanke geformt. Für ein Gewinde M8 in Baustählen ist ein Kernloch mit dem Durchmesser 6,8 mm notwendig.
Wird jedoch das Innengewinde nicht mit einem Gewindebohrer, sondern durch einen Drehmeißel oder durch einen Fräser gefertigt, dann ist der zulässige Kernlochdurchmesser identisch mit dem Mindest- bzw. Kleinstmaß des Innendurchmessers des zu fertigenden Gewindes.
*Dimensionierung*
Üblich für die Dimensionierung ist es, die Gewindesteigung vom Gewinde-Nenndurchmesser abzuziehen.
Welcher Kerndurchmesser für welches Gewinde gebohrt werden muss, kann entsprechenden DIN-, oder ISO-Tabellen entnommen werden, beziehungsweise muss der spezifischen Aufgabe angepasst sein. Die weiteste Verbreitung in Deutschland hat das metrische ISO-Regelgewinde. Im entsprechenden Artikel findet sich eine Tabelle der Kernlochdurchmesser.
Da die Bohrdurchmesser für die unterschiedlichen Gewindegrößen oft „krumme“ Maße haben, zum Beispiel für M4 = 3,3 mm, M5 = 4,2 mm oder M8 = 6,8 mm, werden die entsprechenden Bohrer gelegentlich auch als Kernlochbohrer bezeichnet.
Quellen/Source:
-
-
-
-
-
-
-
Kabelfarben, Kabeldurchmesser
Stromversorgung 5V -12V
| Signal | Farbe | ||
| GND | Schwarz | ||
| +3.3V | grün | ||
| +5V | rot | ||
| +12V | gelb |
Strom 230V
| Signal | Farbe | ||
| PH = Potential Earth | Gelb/grün | Schutzleiter / Erdung | |
| L = Live | Braun oder Schwarz | Phase | |
| N = Neutrall | Blau | Null / Neutralleiter |
-
U72-HF 1x4x0.5 EN 5075
| SCL | weiss | ||
| SDA | blau (Dunkelblau) | ||
| V+ | türkis (Hellblau) | ||
| V- GND | Violett |
-
-
-
- Rot/Schwarz | Querschnitt 1 x 0.5 mm² / Außen-Ø 1.8 mm / LiY / Betriebsspannung: 500 V? (Conrad 60 85 99)
-
Quellen/Source
-
-
-
-
-
-
-
-
- www.cihome.de
-
- Add a comment
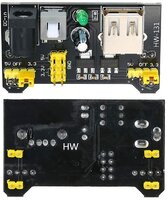
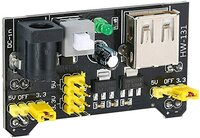
Bread Board Power Adapter 3.3V / 5V - Power-Modul für Breadboards.
Passend für alle Standard-Breadboards (MB-102, ZY-60) Add a comment
Read more: 3.3V / 5V Power Adapter für BreadBoards mit Micro USB
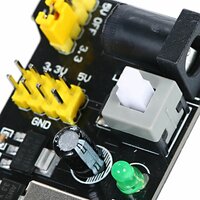
Das HW131 ist ein 3,3 V/5 V MB102 Breadboard-Netzteilmodul, das über zwei 5-V- und 3,3-V-Stromschienen verfügt und eine Mehrzweck-USB-Buchse besitzt.
Das Netzteilmodul passt sicher in ein standardmäßiges 400 Pin oder 800 Pin-Breadboard. Es verfügt über einen Verpolungsschutz.
Das Modul kann einen Eingang von 6,5 bis 12 V aufnehmen und 3,3 V und + 5 V erzeugen.
Das Modul kann auch 5V am USB-Anschluss oder über den USB-Anschluss ausgeben.
Es ist ein Muss für Maker, die elektronische Schaltkreise auf dem Steckbrett testen.
Spezifikationen:
- Eingangsspannung: 6,5-12V (DC-Netzteil (nicht im Lieferumfang)) oder mit USB Stromversorgung
- Ausgangsspannung: 3,3V / 5V schaltbar
- Ausgangsstrom: <= 700 mA
- unabhängige Steuerung auf oberer und unterer Stromschiene, umschaltbar auf 0V, 3,3V, 5V
- Zwei Anschlüsse zu jeweils 3,3V und 5V DC Ausgangspins sind auf der Platine montiert, um ein einfaches externes Herausführen zu ermöglichen.
- Die weiße Taste ist der Hauptschalter des Power Moduls.
- Dimensionen: 53mm x 32mm x 25mm
- Gewicht: 12g
a b c d Add a comment
|
problem with WLAN connection # c |
1 ping -c4 10.18.23.1 > /dev/null 2 3 if [ $? != 0 ] 4 then 5 echo "No network connection, restarting wlan0" 6 /sbin/ifdown 'wlan0' 7 sleep 5 8 /sbin/ifup --force 'wlan0' 9 fi |
--> Link |
|
For the ersten boot
|
Code: /etc/wpa_supplicant/wpa_supplicant.conf
|
Raspberry Pi 4 (Debain10 | Buster) / Toolchain ESP32
Basic Goal: have a Raspberry Pi 4, with Desktop, Arduino iDE (v 1.8.9) Installed then in the Arduino IDE go to Tools - Boards --> Board Manager then Search for ESP32 you will find [esp32 by Espressif Systems] install it.
| docs.espressif.com | |||
| Setup Linux Toolchain from Scratch | |||
| Login as Pi | # sudo -i | ||
| Install Prerequisites | # apt install -y gcc git wget make libncurses-dev flex bison gperf python python-pip python-setuptools python-serial python-cryptography python-future python-pyparsing | ||
| Compile the Toolchain from Source | # apt install -y gawk gperf grep gettext libncurses-dev python python-dev automake bison flex texinfo help2man libtool libtool-bin | ||
| Create the working directory and go into it: | # mkdir -p ~/esp # cd ~/esp |
||
| gcc 8 will be installed but we need gcc 6 to compile | |||
| To check gcc version: | # gcc -v | ||
| To install gcc version 6: | # apt install -y g++-6 gcc-6 | ||
| To switch between gcc6 and gcc8: | # update-alternatives --install /usr/bin/gcc gcc /usr/bin/gcc-8 1 --slave /usr/bin/g++ g++ /usr/bin/g++-8 # update-alternatives --install /usr/bin/gcc gcc /usr/bin/gcc-6 2 --slave /usr/bin/g++ g++ /usr/bin/g++-6 # update-alternatives --config gcc |
||
| Download crosstool-NG and build it: | # git clone https://github.com/espressif/crosstool-NG.git # cd crosstool-NG |
||
| Important Bash 5 have to been accepted | # vi configure.ac | ||
| around line 193 add |5 | |$EGREP '^GNU bash, version (3\.[1-9]|4|5)') | ||
| save and Quit | |||
| # ./bootstrap && ./configure --enable-local && make install | |||
| then Quit sudo with | # exit | ||
| Build the toolchain: | # ./ct-ng xtensa-esp32-elf | ||
| # ./ct-ng build | |||
| chmod -R u+w builds/xtensa-esp32-elf | |||
| # cd /root | |||
| there should be a esp32 directory | # ls -alth | ||
| # cp esp32 -r --parents /home/pi/.arduino15/packages/ | |||
| github | espressif/arduino-esp32 | Installation instructions for Debian / Ubuntu OS | |||
| first know wehre your /Arduino/hardware is | # find / -xdev -name hardware | ||
| cd ~/Arduino/hardware mkdir -p espressif && \ cd espressif && \ git clone https://github.com/espressif/arduino-esp32.git esp32 && \ cd esp32 && \ git submodule update --init --recursive && \ cd tools && \ python3 get.py |
|||
| then copied the xtensa-esp32-elf directory (located in builds directory) over to /home/pi/Arduino/hardware/espressif/esp32/tools/ using copy and paste in the file browsers. |
|||
a
QUellen/Source:
- docs.espressif.com/projects/esp-idf/en/v3.2.2/get-started/linux-setup-scratch.html
- github | espressif/arduino-esp32 | Installation instructions for Debian / Ubuntu OS
-
-
- Add a comment
Bilder:
Documentation:
-
-
-
Quellen/Source:
- www.banggood.com
-
-
- Add a comment
Quellen/Source:
-
- Monitoring Temperature and Humidity Using InfluxDb and Grafana on Raspberry Pi
- Andreas Spiess | #255 Node-Red, InfluxDB, and Grafana Tutorial on a Raspberry Pi
-
-
-
-
-
- Add a comment
Subcategories
Router Article Count: 19
Switch Article Count: 1
NAS / SAN Article Count: 4
Gadgets Article Count: 33
Gadget (englisch für Apparat, technische Spielerei oder auch Schnickschnack) bezeichnet ein technisches Werkzeug oder Gerät mit bisher so nicht bekannter Funktionalität und/oder besonderem Design. Es ist traditionellerweise klein und handlich und zum Mitführen konzipiert. Eine große Rolle spielt der Spaßfaktor eines Gadgets: Geräte, die sich als Gadget definieren, sind oft Grenzgänger zwischen sinnvoller Funktionalität und Verspieltheit.Der Duden definiert Gadget als „kleiner, raffinierter technischer Gegenstand“.
DCIM Article Count: 10
iot Article Count: 117
- Anker 575 USB-C Docking Station (13-in-1), 85W für Laptops
- Perfect Server Hardware for Virtualization | Proxmox | pve-05
- Pioneer Blu-Ray/BD/DVD/CD Reader/writer USB 3.0 BDR-XD07TB | WORKS OK with Debian 11
- NOT WORKING WITH DEBIAN 11 | Dockingstation | IcyBox 14-in-1 USB Type-C | IB-DK2262AC
- How to remove systemd services
- Laptop | Lenovo | Thinkpad E15 Gen3 AMD
- Laptop | Lenovo | LENOVO-IDEA IdeaPad 3 15IGL05 Notebook (15.6 ", 128 GB SSD, Business Black)
- D. Klimo | Kent monoblocks
- TTN Mapper
- LILYGO TTGO T-Beam V1.1 ESP32 LoRa 868Mhz GPS 18650 Board
- LILYGO® TTGO T-Beam 868MHz -> The Things Network (TTN/TTS) -> Karte | Infos und Video bei Alex (www.aeq-web.com)
- Kabelfarben 3.3V, 5V, 12V, 230V | Durchmesser
- 01 Digi-Bee Stand01 Wetter
- Solar Panel | 6V 3W Solar Panel JY D145x145
- TTGO LoRa32 V2.1_1.6 version 433/868/915Mhz ESP32 LoRa OLED 0.96 Inch SD Card Bluetooth WIFI wireless Module ESP-32 SMA
- -pve-04 | Disk SSD and HDD
- DISK SSD | 1 TB | Samsung SSD 870 EVO 1TB - 1TB
- NanoVNA V2
- CubeSat | antennas |
- KoZo_GS3_433MHz
- tinyGS - shortcut what it means
- TinyGS Telegram community | published Links
- Wolfgang W. Osterhage (Springer Verlag Sachbuch 2021): Die Geschichte der Raumfahrt | (gefundene Fehler)
- ucs Univention some commands
- SMA-Stecker / SMA-Buchse


 Im beliebten Werkzeug zur Erstellung von No-Code-Arbeitsabläufen klaffen gleich vier kritische Lücken, eine mit Höchstwertung. Admins sollten schnell patchen.
 Ermittlern gelang in Spanien ein empfindlicher Schlag gegen die als „Black Axe“ bekannte nigerianische Cyber-Mafia.
 Die Version 3.0.23 des VLC Media Player bessert diverse Schwachstellen aus, die möglicherweise Unterschieben von Schadcode erlauben.


