Perfect Server
the Goal is to reach a KVM Server with IPv6
Add a commentKVM with Graylog
Memory: 4GB
Hard Disk: 250GB
IOS: Debian 9
Hostname graylog-01
IP 10.147.42.40
build a homepage for photographer (CMS, Foto)
Quellen / Source:
- lychee
- koken works nice with Lightroom
- zenphoto
- piwigo
- galleryproject but closed sinc 2014
- Coppermine Photo Gallery
- 4homepages
- format.com $$$
-
-
-
Desktop Software
- lightzoneproject.org
- rawtherapee.com
- Capture One
- darktable.org
-
-
-
Add a comment
| Debian 9 (Stretch) , Installation on a Proxmox KVM Server | Debian 8 on a LXC Contaner |
|
just select apt install -y vim-nox To enable SSH login for a root user on Debian Linux system you need to first configure SSH server. Open /etc/ssh/sshd_config and change the following line: remove the #
|
first with nano /etc/ssh/sshd_config
# reboot
an Login with Traterm |
|
# apt full-upgrade # apt update -y && apt upgrade -y && apt autoremove # apt install vim-nox -y echo set number >> ~/.vimrc echo syntax on >> ~/.vimrc dpkg-reconfigure tzdata echo This email address is being protected from spambots. You need JavaScript enabled to view it. >> ~/.forward |
|
| vi /etc/network/interfaces auto eth0 iface eth0 inet static address 10.147.42.70 netmask 255.255.255.0 gateway 10.147.42.1 |
die IP Adresse wir im Proxmox GUI direkt bei der Herstellung des LXC angegeben | |
| sudo apt-get install debsecan | ||
| man debsecan | man Page | |
| 'pkg audit -F' | for freebsd |
Once you made the above change restart your SSH server:
# /etc/init.d/ssh restart
[ ok ] Restarting ssh (via systemctl): ssh.service.
Add then Munin-Node and Munin-Plugin
und ein Paar Tools für Analysen oder Messen der Auslastung
| iftop – Network Bandwidth Monitoring | apt-get install iftop | iftop |
| IPTraf– Real Time IP LAN Monitoring | apt-get install iptraf | iptraf |
| Htop– Linux Process Monitoring | apt-get install htop | htop |
-
-
-
-
Add a comment
LXC | openLdap with GOsa2
Debian 8
RAM 1GB
HD 25GB
Infos GOsa2: oss.gonicus.de/
Infos openLDAP: www.openldap.org/
Proxmox KVM openBSD pfSense NAT
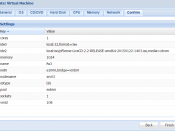
Proxmox Version: proxmox-ve-2.6.32: 3.3-143 (running kernel: 2.6.32-35-pve)
Pfsense Version: 2.2
First Download the file and unzip it to get the ISO file
Upload the file to your Proxmox Server
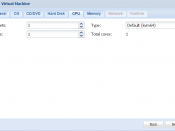
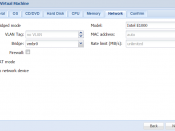
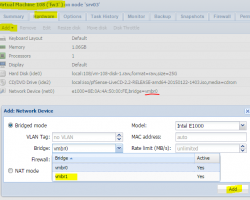
Important before you start the Virtual Server you have to add a second Network which you have defined before in Proxmox Network
Proxmox KVM Server
Win 8 update auf Win 8.1
2GB - 4GB RAM (2048/4096MB)
126 GB Harddisk space
virtio-win-0.1-94.iso Download
wie wurde Installiert? Gemäss Doku
ab und zu gibt es errors
| BAD_POOL_HEADER | ||
| MEMORY_MANAGEMENT | ||
| and someting wiht sql ? |
Subcategories
Perfect Server HW Article Count: 25
Perfect Server SW Article Count: 14
VM Virtuelle Maschine Article Count: 37
- Anker 575 USB-C Docking Station (13-in-1), 85W für Laptops
- Perfect Server Hardware for Virtualization | Proxmox | pve-05
- Pioneer Blu-Ray/BD/DVD/CD Reader/writer USB 3.0 BDR-XD07TB | WORKS OK with Debian 11
- NOT WORKING WITH DEBIAN 11 | Dockingstation | IcyBox 14-in-1 USB Type-C | IB-DK2262AC
- How to remove systemd services
- Laptop | Lenovo | Thinkpad E15 Gen3 AMD
- Laptop | Lenovo | LENOVO-IDEA IdeaPad 3 15IGL05 Notebook (15.6 ", 128 GB SSD, Business Black)
- D. Klimo | Kent monoblocks
- TTN Mapper
- LILYGO TTGO T-Beam V1.1 ESP32 LoRa 868Mhz GPS 18650 Board
- LILYGO® TTGO T-Beam 868MHz -> The Things Network (TTN/TTS) -> Karte | Infos und Video bei Alex (www.aeq-web.com)
- Kabelfarben 3.3V, 5V, 12V, 230V | Durchmesser
- 01 Digi-Bee Stand01 Wetter
- Solar Panel | 6V 3W Solar Panel JY D145x145
- TTGO LoRa32 V2.1_1.6 version 433/868/915Mhz ESP32 LoRa OLED 0.96 Inch SD Card Bluetooth WIFI wireless Module ESP-32 SMA
- -pve-04 | Disk SSD and HDD
- DISK SSD | 1 TB | Samsung SSD 870 EVO 1TB - 1TB
- NanoVNA V2
- CubeSat | antennas |
- KoZo_GS3_433MHz
- tinyGS - shortcut what it means
- TinyGS Telegram community | published Links
- Wolfgang W. Osterhage (Springer Verlag Sachbuch 2021): Die Geschichte der Raumfahrt | (gefundene Fehler)
- ucs Univention some commands
- SMA-Stecker / SMA-Buchse



 Angreifer können bei Moxa-Switches der EDS-508A-Serie die Authentifizierung umgehen. Die Sicherheitslücke gilt als kritisch.
 Nvidia hat Sicherheitslücken in seinen Grafikkartentreibern entdeckt. Angreifer können dadurch Informationen abgreifen. Updates stehen bereit.


