Firewall
| steps |
On IPA serverIPA uses the following ports to communicate with its services: |
||
| TCP ports: 80, 88, 443, 389, 636, 88, 464, 53, 135, 138, 139, 445, 1024-1300 | |||
| UDP ports: 88, 464, 53, 123, 138, 139, 389, 445 | |||
-
- - - -
Quellen/Source:
- needed Ports for FreeIPA
-
- 0 Comments
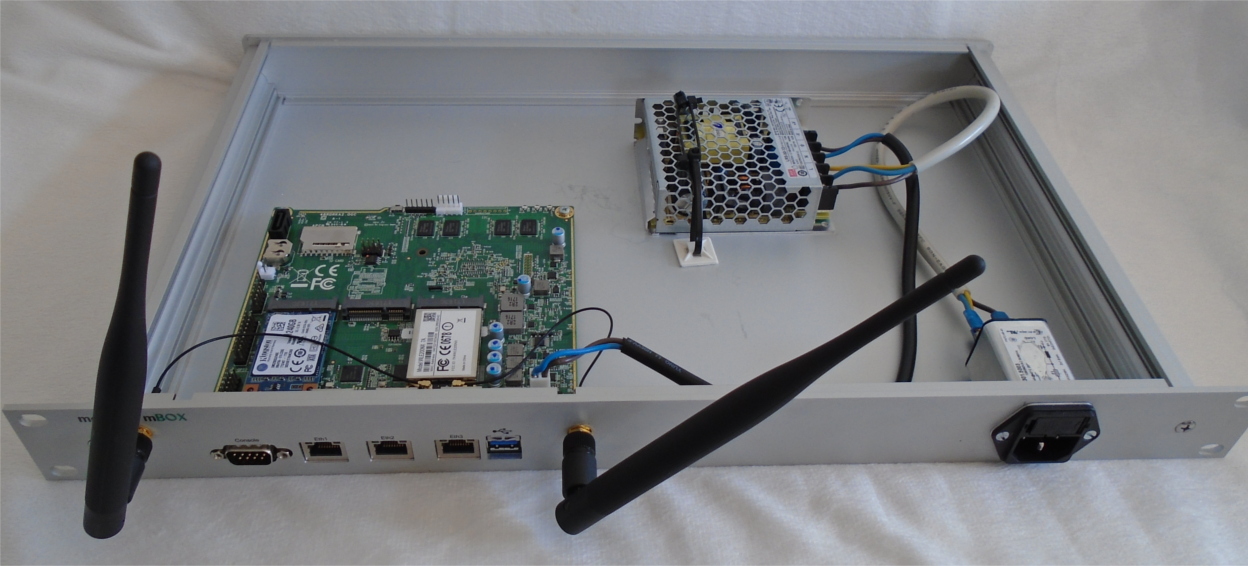
apu2c4 / 4 GB DDR3-1333 DRAM / WLAN wle200nx / 240GB mSATA Kingston
List of the Hardware --> Firewall | Hardware
 where one the design
FW/opnSense = apu2c4
WAN = Eth1
eth0 = Eth2
eth1 = eth3 (but later)
List of IP Range & VLAN --> Firewall | IP & VLAN
Alle Teile zusammenschrauben und löten.
| Link: | PC Engine howto - OS Installation - opnsense Download opnSense Etcher |
|
| Steps: |
Important: the SD slot on the apu2 boards is directly connected to the CPU and needs the module SDHCI to work. Installation Steps¶The installation process involves a few simple steps. Tip
|
opnSense Installation |
| Problems: |
|
my config:
| libre SSL | GUI |System⇒Settings⇒General | Install OpenSSL & LibreSSL | system, Firmware, Settings |
| System update | GUI | via System⇒Firmware | ||
| clamAV | Plugin | install clamAV |
Source/Quellen/Infos:
- OPNSense hinter FB 6490 Cable
-
-
-
-
-
- opnSense Unifi Controller | Unifi how to Install...
- opnsense WIFI setup
-
-
-
-
-
2 Comments
Add WLAN Interface (IP Adressen entsprechend anpassen)
OpnSense Version
OPNsense 17.7.12-amd64
FreeBSD 11.0-RELEASE-p17
LibreSSL 2.6.4
| Interface - Wireless - Device | +add [Description] |
||
| Interface - Assignments | select network Port and Press + select the Interface Name crated |
||
| General configuration Enable Interface Descritpion [WLAN] IPv4 Configuration Type [static IPv4] |
|||
| Static IPv4 configuration IPv4 address [10.20.20.1]/24 |
|||
|
Common wireless configuration - |
|||
| Network-specific wireless configuration Mode [Access Point] SSID [name des Signal] WPA [x] Enable WPA WPA Pre-Shared Key [passowrt] WPA Mode [WPA2] |
|||
| save & Apply Changes | |||
| System - Gateways - All | +add gateway Interface [WLAN] Name [GW_WLAN] |
||
| Services - DHCP - Server (Select the WLAN Tab)!!! |
Enable [x] Range add from to DNS Server [add IP] |
---
System - Configuration - Backups
Dann Download Configuration
system wieder lauffähig machen.
letzes Backup
via System - Configuration - Backups [Restore]
file auswählen und die Firewall rebootet 0 Comments
Quellen/Source:
- dlna wiki Page
- wombat Plex | needed Ports
- opnSense forum | DLNA propacation
- wombat Philips 32PFK5300
-
-
-
-
-
-
- 0 Comments
Subcategories
OPNSense Article Count: 12
- Anker 575 USB-C Docking Station (13-in-1), 85W für Laptops
- Perfect Server Hardware for Virtualization | Proxmox | pve-05
- Pioneer Blu-Ray/BD/DVD/CD Reader/writer USB 3.0 BDR-XD07TB | WORKS OK with Debian 11
- NOT WORKING WITH DEBIAN 11 | Dockingstation | IcyBox 14-in-1 USB Type-C | IB-DK2262AC
- How to remove systemd services
- Laptop | Lenovo | Thinkpad E15 Gen3 AMD
- Laptop | Lenovo | LENOVO-IDEA IdeaPad 3 15IGL05 Notebook (15.6 ", 128 GB SSD, Business Black)
- D. Klimo | Kent monoblocks
- TTN Mapper
- LILYGO TTGO T-Beam V1.1 ESP32 LoRa 868Mhz GPS 18650 Board
- LILYGO® TTGO T-Beam 868MHz -> The Things Network (TTN/TTS) -> Karte | Infos und Video bei Alex (www.aeq-web.com)
- Kabelfarben 3.3V, 5V, 12V, 230V | Durchmesser
- 01 Digi-Bee Stand01 Wetter
- Solar Panel | 6V 3W Solar Panel JY D145x145
- TTGO LoRa32 V2.1_1.6 version 433/868/915Mhz ESP32 LoRa OLED 0.96 Inch SD Card Bluetooth WIFI wireless Module ESP-32 SMA
- -pve-04 | Disk SSD and HDD
- DISK SSD | 1 TB | Samsung SSD 870 EVO 1TB - 1TB
- NanoVNA V2
- CubeSat | antennas |
- KoZo_GS3_433MHz
- tinyGS - shortcut what it means
- TinyGS Telegram community | published Links
- Wolfgang W. Osterhage (Springer Verlag Sachbuch 2021): Die Geschichte der Raumfahrt | (gefundene Fehler)
- ucs Univention some commands
- SMA-Stecker / SMA-Buchse


 In den weit verbreiteten XZ-Utils klafft eine Sicherheitslücke, die sich womöglich zum Einschleusen von Schadcode missbrauchen lässt.
 Unter bestimmten Bedingungen können Angreifer einen Schutzmechanismus von Windows umgehen und Schadcode ausführen.


